

Maybe you know, I am addicted to making "string blocks"! A friend asked me how to do them and I told her that I guessed it would be easier to show her. So here goes, Rita!
Decide on what size square you want and, as seen below (I should have put that picture first), I made a template out of a mail order catalog (good recycling!). My squares are going to be 7 inches, so I made my template 7-1/2 inches square, allowing for 1/4 inch seams. Then, as seen above, I made a template for the center "string" of the block out of lightweight cardstock. This template is 3 inches wide and goes from one corner of the square across to the opposite corner.

Using that middle 3 inch strip template, I cut straight 3 inch strips for the middle of each block, longer than the template and laid them on the paper square.

Then I cut strips of all the different matching fabrics that I planned to use. I chose not to cut straight strips for these because I thing the "wonky" sized strips make it more interesting.

I cut different width strips too. Some skinny and some wider, but not as wide as the middle 3 inch strip.

To begin sewing, pin your middle strip down. Lay one of your secondary strips on top of the middle strip, matching edges, right sides together and sew through the three layers making that seam.

(I just have this pinned to show you.) Then open flat and iron it down. Leave all the edges hang over the paper template until the square is completed.

Then do the same on the opposite side, right sides together and sew...

Open flat and iron down. (oops, I see I used a strip too short on this one, but you get the idea.)

Continue side to side until the square is completely covered.

Then, turn over and with a rotary cutter, trim off the extra fabric, cutting it to the size of the paper template.

Here is how your finished square will look. On the back, cut the paper between seams and gently tear it off. I don't have any trouble with this, if you hold the fabric at the seam where you are beginning to tear and just pull gently to get a start. If a little of the paper is left on, no one will know when you put the batting/backing on and finish you quilt. Don't agonize over little specks of paper.
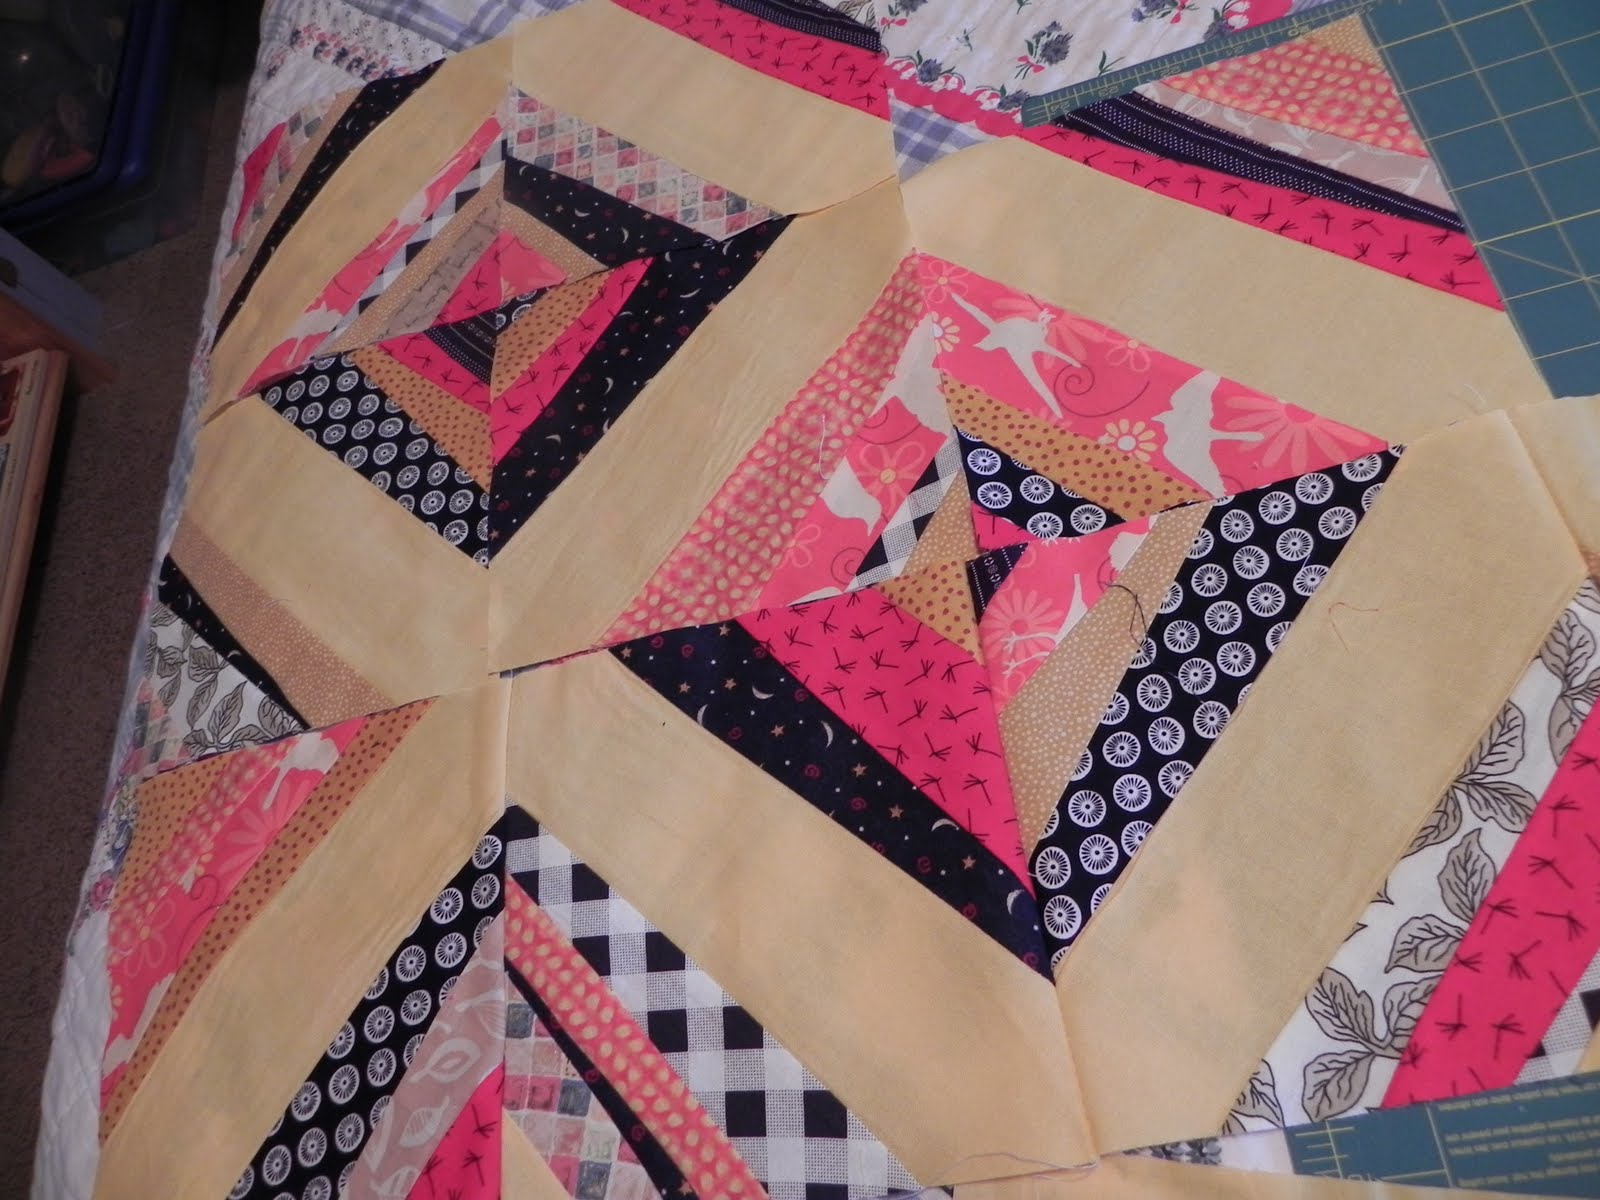
When you get your squares done and sew them together, this is the pattern it creates. The wonky cut strips don't match when all the square are put together, but again just adds interest.

Each square you make is one-fourth of the big block that creates this...

Voila!
I hope this is clear. If it is and you like it as much as I do, you will not be able to stop!

4 comments:
Thanks April! I have a passion for scrap quilts and this pattern is perfect. I love the randomness of scrap quilts. I think I'll try to stay within one color family in each block. Lord knows I have enough scraps.
Me too, Rita! Such fun! I can't wait to see what you've done.
Nice tutorial, April. Looks like a lot of fun. Can't wait to see yours too, Rita!
I love the look of scrap quilts too! I told Mandy about it too.
Post a Comment